Decking
Decking DIY Deck PlansDecking: How to Install Wood Deck Boards
Decking: How to Install Wood Deck Boards DIY Deck PlansSecuring the First Wood Deck Board
To secure the first wood deck board, you must first chalk a line across the joists parallel with the house. If the chalk line and house do not measure parallel, adjust the first deck board or scribe the board.
Cut the first deck board to length and fasten it down.
Spacing of Deck Boards
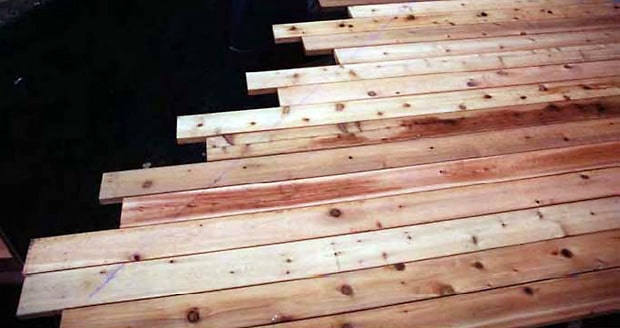
Proper spacing is required for ventilation and expansion/contraction. If the wood is very wet when it is installed, you can probably install the deck boards tight together and a sufficient gap will open up as the boards dry.
For wood that is already dry, place a 6 penny nail between each board as you go to establish the proper gap. This will ensure that water can drain adequately from the deck, and the deck boards have room to expand and contract with the seasons.
Securing the Deck Boards
Deck boards are secured with nails or screws from the top, bottom or between the deck boards. With so many options available please refer to manufactures recommendations and be familiar with different hidden fastener systems.
Do not fasten your decking into the outside joist at this point.
Once all of the deck boards are laid down and secure, chalk a line around the outside perimeter and cut off the overhang.
Decking: How to Install Composite Decking
Decking: How to Install Composite Decking DIY Deck PlansComposite decking, or maintenance free decking materials, vary in expansion and contraction and use many different fasteners. Be sure to check the manufacturer specifications before beginning installation. If the decking has not been installed properly (according to the manufacturer instructions) the warranty may not be honored.
Composite Decking Installation Tips:
- Before installing the maintenance free material, lay it flat on the deck surface for 30 minutes or longer (depending on the ambient temperature). This will help to eliminate any shapes or bends that may have formed in the plastic composite.
- Be sure to allow for adequate expansion and contraction, especially when building in the fall and winter. Each manufacturer gives detailed information on joint spacing for different temperatures and material lengths.
Spacing of Composite Deck Boards
This varies from product to product. Some manufactures supply spacers and some product spacing is set by the fastening clip system supplied to secure the product.
Proper spacing is required for ventilation and expansion/contraction. Check manufactures specification for recommended spacing
Securing the Deck Boards
Composite deck boards are secured with nails or screws from the top, bottom or between the deck boards. With so many options available please refer to manufactures recommendations and be familiar with different hidden fastener systems.
Learn how to install decking using Shadoe Track Hidden Fasteners, and the CAMO Hidden Deck Fastening System.
Cutting off Decking
Always leave the deck boards extending past the outside joist when lying decking. Chalk a line once all the decking is down and cut with a circular saw. When cutting off maintenance free decking, cut off the deck boards when all of the decking is complete.
It is important to cut off maintenance free all at once due to the expansion and contraction of the deck boards. This will give a more consistent straight line.
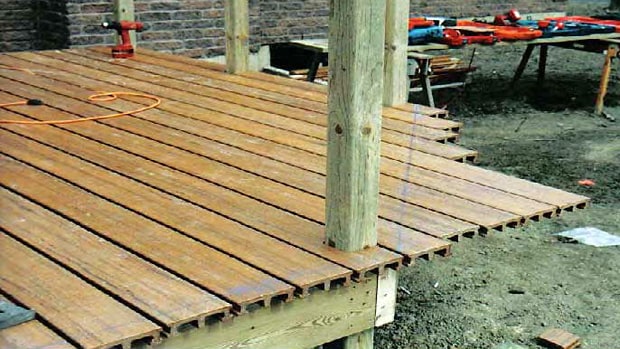
Decking: How to Install Shadoe® Track Hidden Fasteners
Decking: How to Install Shadoe® Track Hidden Fasteners DIY Deck PlansInstalling Shadoe® Track is a 3 step process:
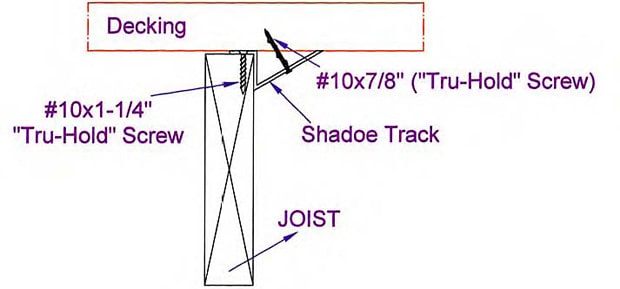
- Screw Shadoe® Track to the top of each joist using "Tru-Hold" screws. The track should be flush with the top of the joist, and flat along the side of the joist. Adjacent joists should have the joints between the track pieces staggered.
- Install the deck boards one at a time.
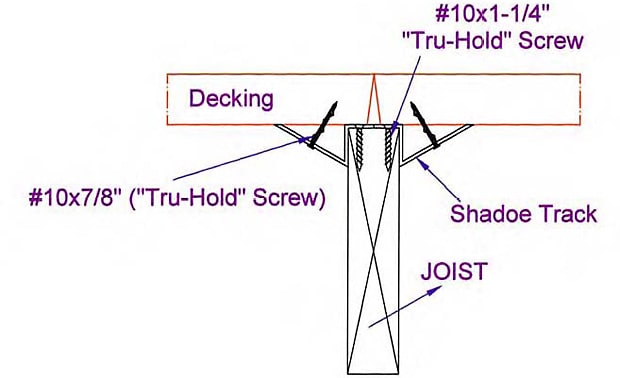
- Kneel on top of the deck board and reach under the deck to screw up from below the deck, through the track, into the deck board. The track is designed to accommodate at least 2 screws per deck board. A high deck can be installed from below, but a second person should stand on the boards as they are attached to ensure a tight fit as the screws are installed.
- For easier installation, install Shadoe® Track on right side of joists, facing the house, and towards the inside of the deck for the outside joist.

- Do not put Shadoe® Track where rail posts are to be installed.
- Leave off the front faceplate until the last board is on to be able to reach under the deck or step.
- Install the joist blockings lower to allow for the Shadoe® Track.
- When installing a perimeter board secure a 2x4 spacer to the bottom of the deck board. Screw the 2x4 through the outside joist and spacer/boarder joist.
- Do not put Shadoe® Track where rail or privacy screen posts will be installed. A minimum of 3 screws per board are to be installed through the track into the bottom side of the board.
- When fastening into maintenance free materials full thread screws must be used.
- When installing Shadoe® Track at a joint in the decking, install a short piece of Shadoe® Track on the opposite side of the full length to provide additional support to the joint.
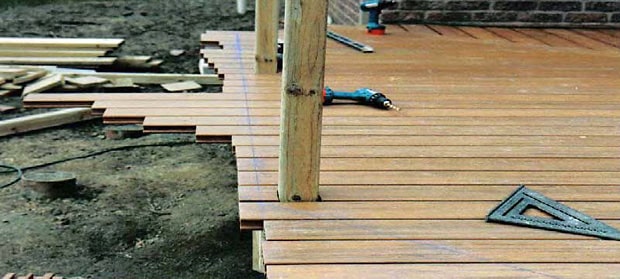
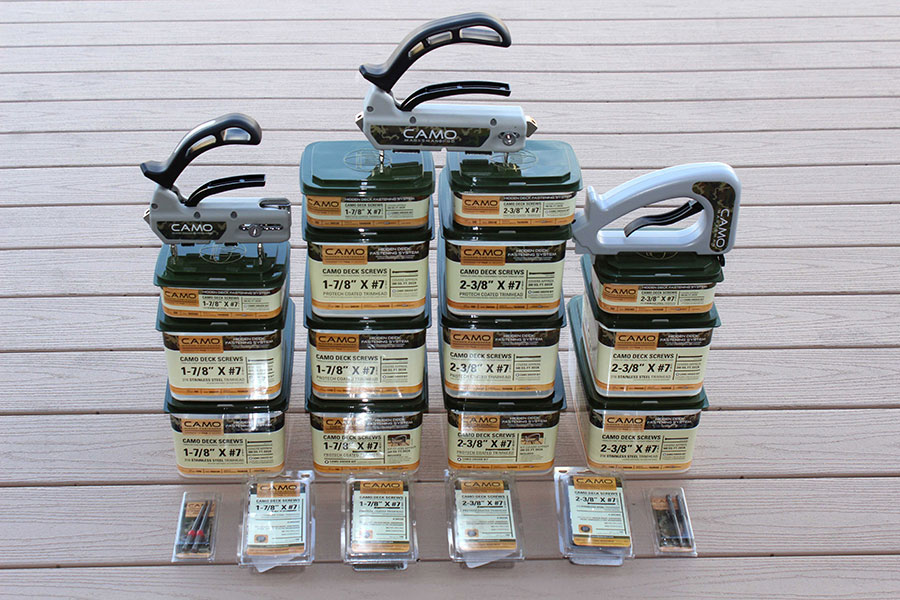
Decking: How to Install Deck Boards With the CAMO Hidden Deck Fastening System
Decking: How to Install Deck Boards With the CAMO Hidden Deck Fastening System DIY Deck PlansThe CAMO hidden deck fastening system uses a patented and warranted screw that is unique to them. Rather than use a hidden bracket, or other joint hardware, CAMO takes a direct approach, attaching the deck boards to the frame of the deck itself, the strongest possible joint.
To make the screw hidden, the CAMO approach is to drive the fastener on an angle, through the edge of the deck board, into the frame below. To achieve this, CAMO has developed a proprietary guide tool to work in conjunction with their specialty fasteners.

The tool has a stop that rests against one edge of the deck board and a top handle that allows pressure to be applied to pull the tool snug against the board to prevent slippage. If you have ever worked with pocket screws, you may be familiar with similar processes.
Since the guide is used resting on top of the board, with only a thin stop extending down into the groove between boards, it allows both edges to be fastened with the board in position, even along the edge that rests next to the last board installed.
The CAMO screw can be driven with a standard cordless drill or screw gun, using their patented tips shaped to fit their drive head and made long enough to run through the guide. One key feature is the CAMO’s small screw head. This allows the screw to run between boards and leave a very small hole above the head, even when it is counter-sunk.
- Mark your boards with a pencil over the center of the joist below.
- Position the board as you usually would, using spacers along the most recently attached board for a straight gap.
- Starting on the outside edge, away from the installed decking, position the CAMO tool aligned to the mark and drive one fastener into each joist along the whole edge.
- Once the outside edge is fastened down, turn your tool around and install fasteners down the opposite edge.
- To remove a damaged board, simply reverse the process. Use the tool to align the bit, press firmly on the drill to engage the head and with the drill in reverse, back the screw out of the board. Repeat until all screws are removed
Decking: How to Lay Deck Boards Around a Bump Out
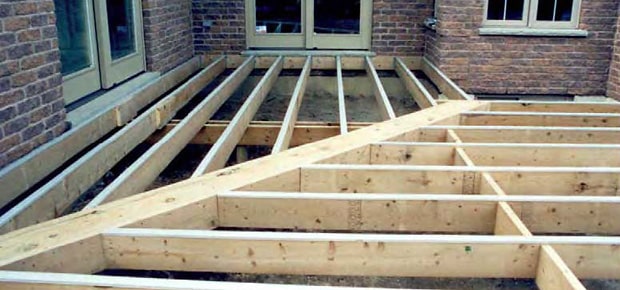
Decking: How to Lay Deck Boards Around a Bump Out DIY Deck PlansWhile many homes have flat walls adjoining the deck, frequently the construction will have corners and “bump outs” for doors, windows, chimneys and other architectural features. The best way to install decking is from the outside edge in, so that any “scribed” pieces are ripped to width to fit along the wall of the house, so that the rough edge is hidden. Bump outs present a challenge to this.
Straight Decking
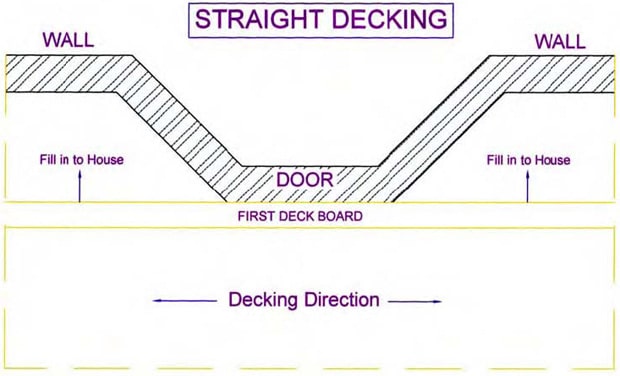
If your deck boards are being installed perpendicular to the frame and parallel to the house, lay the deck from the outside edge up to the bump out, leaving the pockets on either side for last.
Cut each piece of decking for the pockets to fit, mitering the ends if needed, similar to the illustration. Fit each piece and fasten it before installing the next to ensure a perfect fit. Lay full-width decking boards as far as you can, until the gap between the last board and the wall is too narrow for a full piece.
Measure the gap between the edge of the last full board and the wall at both ends and in at least one place in the middle of the section. Mark your deck board and cut to width using a jig saw, if the edge is not straight, or a circular saw for straight edge. Fit and fasten the last piece.
Angled Decking

If your decking is angled, or runs perpendicular to the wall, each piece will need to be cut at the end to fit against the wall.
- Lay decking up until the point that the bump out will interrupt the pattern, from end of the deck.
- Fit deck boards long enough to extend past the end of the deck and reach the wall.
- Measure and cut the ends to fit and install and fasten each board as you go to ensure the best fit.
- Install full-width boards as far as possible until the gap between the last board and the bump out is too narrow for a full piece.
- Measure, mark and cut the final piece to fit against the bump out as described for straight decking.
Decking: How to Scribe Decking to Stone
Decking: How to Scribe Decking to Stone DIY Deck Plans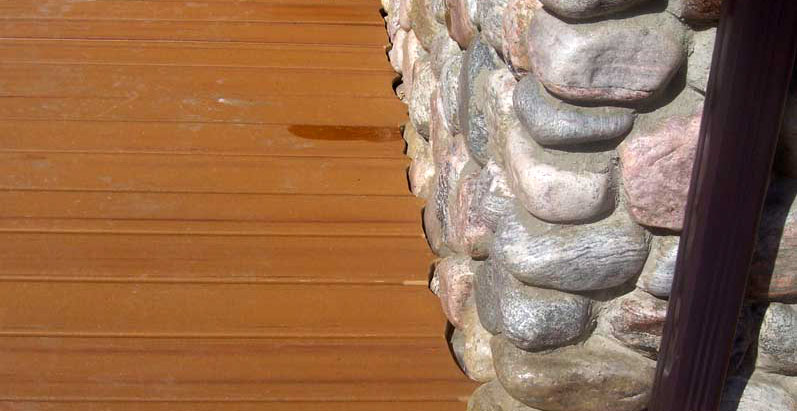
When uneven surfaces butt up to the deck surface, you will need to scribe the edge, or end of the board where it meets the stone, or other rough face.
Pro Tip
The easiest way to do this is to use a drawing compass, or a thick wooden dowel to transfer the line of the surface onto your material.
Compass Method
- Set a compass so that the scribe and pencil are an inch apart.
- Tighten the compass to lock it in place.
- Position your material as close to the rough face as possible. If the rough surface is also on an angle to the decking, miter the decking ends first.
- Place the scribe of the compass against the rock, so that the pencil’s point rests on the deck board.
- Slowly drag the compass along the surface, so that the pencil marks a line on the deck board that duplicates the line of the rough surface.
- Cut the edge with a jig saw for a tight fit.
Dowel Method
- Tape a pencil to the side of a one inch dowel section, about a foot long, so that it is parallel to the length of the dowel and the point of the pencil extends past the end of the dowel.
- Drag the dowel along the wall as described above for the compass.
- Cut the edge along the line with a jigsaw.
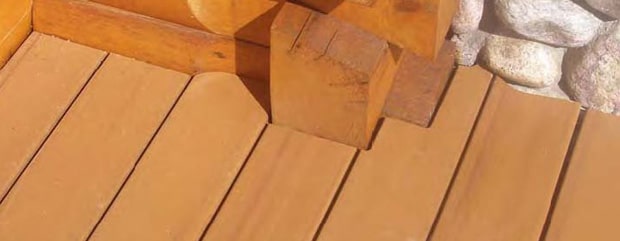
Scribing Around Square Shapes
- Place your deck board as close to position as possible.
- Mark the board where it will intersect with the shape while it is in position. This will provide the most accurate position for your scribe.
- Measure and mark the shape of the scribe onto the board, checking your measurements carefully.
- Cut the scribe out with a jigsaw.
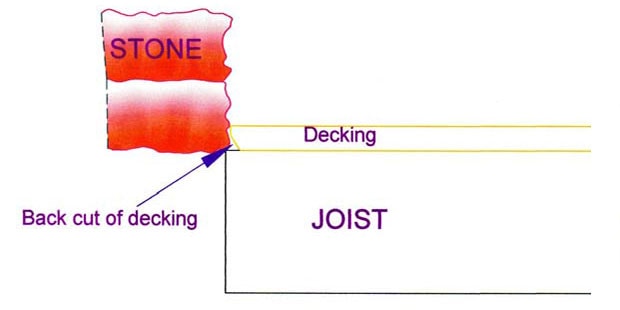
Pro Tip
Whether scribing up against stone, or other uneven shapes, you can achieve a tighter fit by back-cutting each deck board with a jig saw.
Decking: How to Install Pattern Boards
Decking: How to Install Pattern Boards DIY Deck PlansPattern boards are a great way to add visual interest to your deck and elevate it above the standard DIY deck. While neat rows of decking can give a clean and simple appearance, adding some patterns to your decking can also simplify installation on large decks that run more than one direction, or even help maximize deck materials to reduce cost.
Using decking as a pattern board
Pattern boards typically fall where two sections of decking are joined, end to end. The pattern board can be installed perpendicular to the prevailing installation at 90° if the boards are in line with each other. In this case, no special framing is needed. This works well to make use of shorter lengths of lumber where just a few inches of reach are needed.
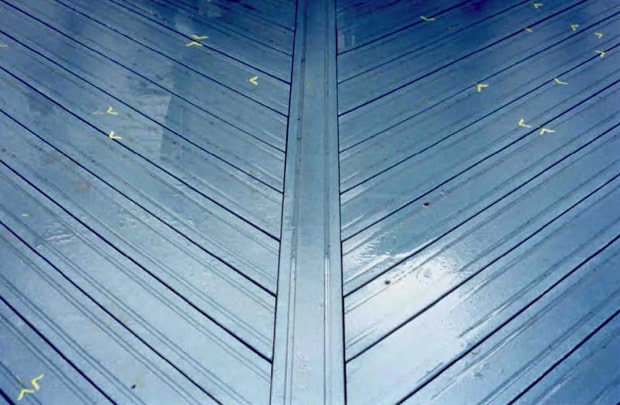
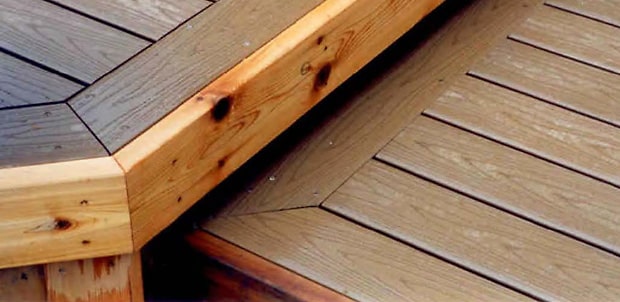
Where two sections of decking meet at a mitered corner, a pattern board, laid diagonally to join the two sections makes for neat joints and provides visual interest.
- Determine where the pattern board will lie while constructing your frame.
- Add two diagonal joists spanning the distance of the pattern board, before installing standard joists in the two adjoining sections. They should be spaced a few inches wider than the width of the deck board. In the illustration, a 2x8 is used between them, requiring a 7 ½” space.
- Install the cap board between your two diagonal joists to support the pattern board.
- Miter the joists in the two adjoining sections to match up to the diagonal joists. Space them as you normally would.
- Install your pattern board first on top of the cap board and fasten it in place.
- Miter the decking for the two adjoining sections to fit neatly against the edges of the pattern board for a clean joint.
Decking: How to Install Perimeter Boards
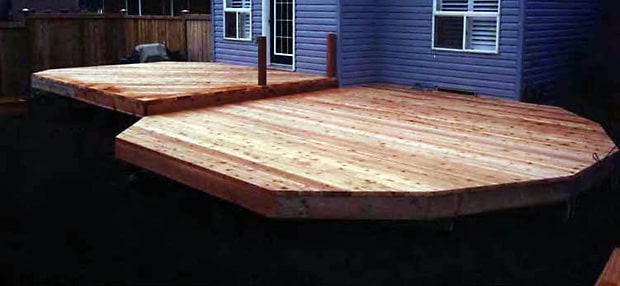
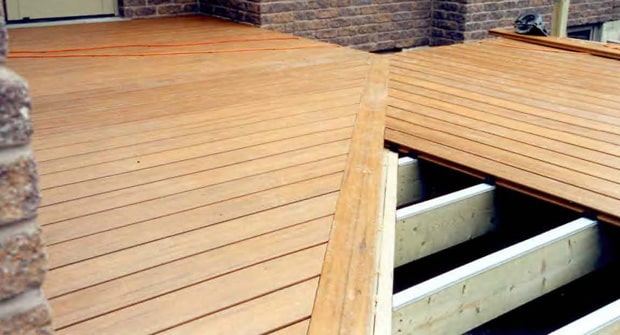
Decking: How to Install Perimeter Boards DIY Deck PlansPerimeter boards are another type of board patterning where decking is laid parallel to the edge of the deck frame, in areas where the ends of the decking boards would simply be cut to match the frame, leaving exposed ends.
Perimeter borders serve three primary purposes:
- They cover the butt ends of your material, which gives a neater appearance and serves as edge trim.
- They can be used to make use of shorter deck boards in an area that requires just a few extra inches of length.
- They can serve to accent a level change on the deck, providing a perpendicular line to the decking to make the edge more visible.
Perimeter Board Installation
Borders are installed using similar techniques to the rest of your decking.
- Cut boards to fit, using one full piece, instead of multiple pieces, wherever possible.
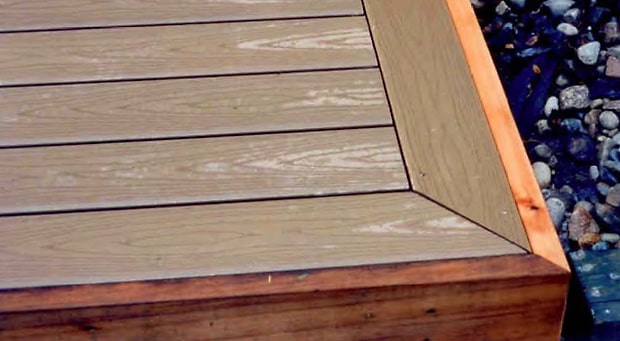
- Cut miters at corners, so that end borders connect with the edge board, creating a “frame” effect around the decking.
- Deck Trim can be installed with deck overlapping trim, or trim overlapping deck and flush at the top edge, depending on your preference.