Stairs: How to Install Wrap-Around Stringer Stairs on Your Deck
Stairs: How to Install Wrap-Around Stringer Stairs on Your Deck DIY Deck PlansRiser/Stringer Stairs with Outside Corners
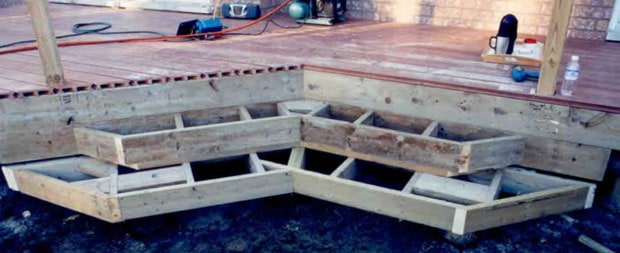
The framing for stringer stairs with outside corners is similar in every way to standard stringer stairs, except at the corner. Space stringer every 16” OC and mount them using drop blocks as described in the stair building section. When calculating corner miters, take the angle of the corner, for example a 45° corner is made up of two 22 ½ ° miters. The risers, or toe kicks, get mitered at the corners where the meet the riser coming from the opposite angle of the corner.
- Mark, cut and install all stringers, checking for level.
- Install an additional stringer at the inside of the corner, on each angle of the corner to provide support for the corner of the stair.
- Measure and cut each riser, or toe kick, to fit each stair. Cut the mitered end first, then measure and cut the square end for accurate, simple miters.
- Attach each riser, fastening them to the stringers with at least two deck screws, or nails, wherever they riser meets the stringers.
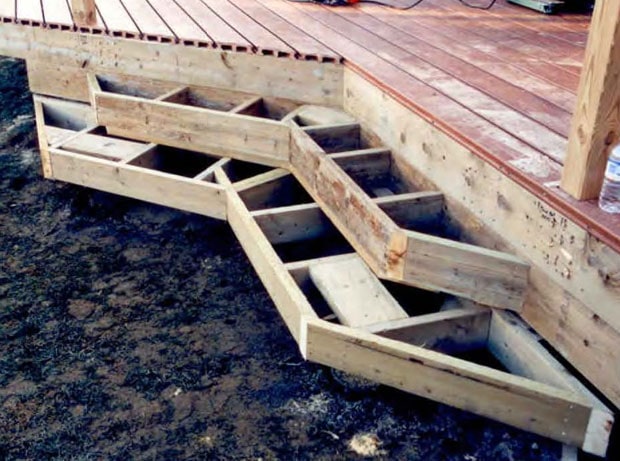
- Measure and cut any notches, or other adjustments required. *In the photo, the riser on the second stair down is notched for a step light and wiring.
- Add wiring and other internal structure while the stairs are still open and accessible.
- Add stair treads once all framing and internal construction is complete.
- Install decking boards on top of treads, if needed.
- Install trim once all other parts are in place for best appearance.
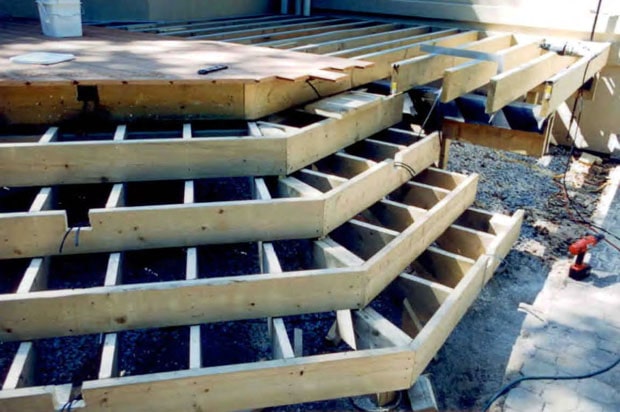
Another option for framing outside corner supports is to add solid lumber blocking in the space between the two stingers closest to the corner.
- Measure the corner space and mark it out on a piece of 2x12 PT lumber.
- Cut along the lines with a circular saw, or miter saw.
- Dry fit the blocking and make any adjustments needed for a perfect fit.
- Set the blocking so that the top edges are flush, or a little below the top edge of the stringers and riser. This makes tread installation simpler.
- Nail or screw through the stringers and riser into the edge of the blocking on all sides to fasten it in place.
- Use multiple pieces, if needed, to cover the entire space. Install pieces from the rear out for easier installation.
Box Steps with Inside Corners
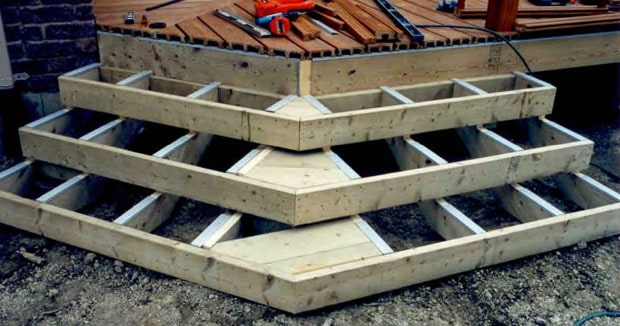
When building box steps with inside corners, frame one side of the corner as if it were stand alone. The toe kick goes from the face plate back to the drop block. Add blocking and Fasteners as if this stair were complete. Add the opposite angle so that it butts up to this toe kick. This a much stronger joint than if the toe kicks were mitered together.
Overlap outside corners, with the front piece mitered to fit the angle of the opposite face. Miter the back piece to sit flush against the back of the front toe kick at the joint.
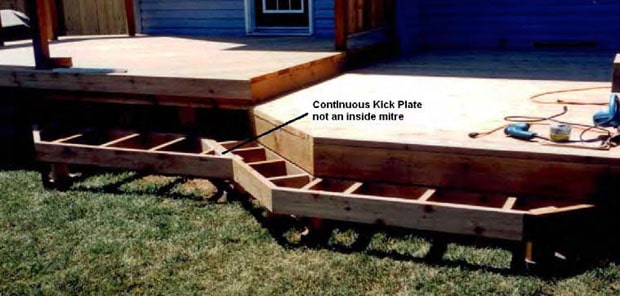
Always build the bottom step of a box step first to provide a foundation for the steps above. For box steps that end with an angle, install the toe kick so that it runs parallel to the faceplate of the deck. Measure the angle off of the toe kick. *In the photo, the end of the step runs 45° back from the toe kick. Overlap these corner joints, rather than joining them on the miter for a stronger joint. Since the outside end piece has the least support, extend it over the toe kick, flush with the face of the toe kick for added strength.
Measure using the bottom step as a template for your top step. Layout the top step so that the backset is even on all faces, unless the ends are to be longer or shorter. If your box steps are large you will need footings. Space them as you would for deck support and install the footings and posts before you begin frame construction for simplicity.
