How to Install 2x8 Deck Beams
How to Install 2x8 Deck Beams DIY Deck PlansDeck beams sit on top of the posts and support the deck joists. If the outside edge of your deck is at least 17” above grade, a double 2x8 deck beam should be installed to support the joists along the outside. The joists will then extend over the beam in a cantilever position.
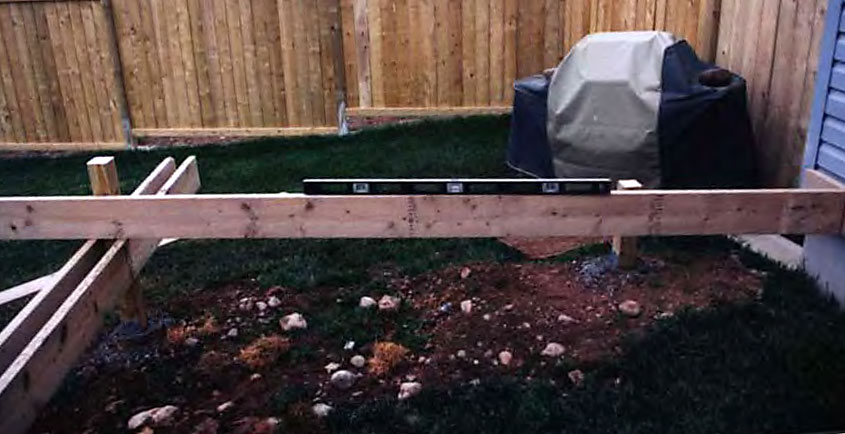
In decks that extend more than 16’ out from the house, a similar beam is installed, parallel to the house, at 16’ so that joist ends can overlap on top of the beam, since 16' is the span limit of 2x8 joists.
- Position a joist so that one end is against the ledger board, with the top edge even with the top edge of the ledger, at the house wall and the other end extends out to the outline string and the posts. Place it even with one post.
- Lift the outside end until the top edge is level. It should be even with your deck height string, if that is still in place.
- Tack the joist to the post with a single screw to hold it in place temporarily.
- Do this at each outside post.
- Position a piece of 2x8 lumber against the outside face of the posts and lift it up until the top edge touches the bottom edges of the joists you attached to the posts.
- Use lag bolts to fasten the 2x8 to the post faces, two bolts in each post.
- Repeat steps 5 and 6 with a second 2x8 on the opposite face of the posts to create the double beam.
Lift up the 2X8 beam to the bottom side of leveled joist and fasten into 4X4 support post using 2 rows of four 3¼” galvanized nails. Be sure all posts of the beam are level before fastening it to the posts completely. For high decks, beams must be notched into both sides of the 6X6 support post.
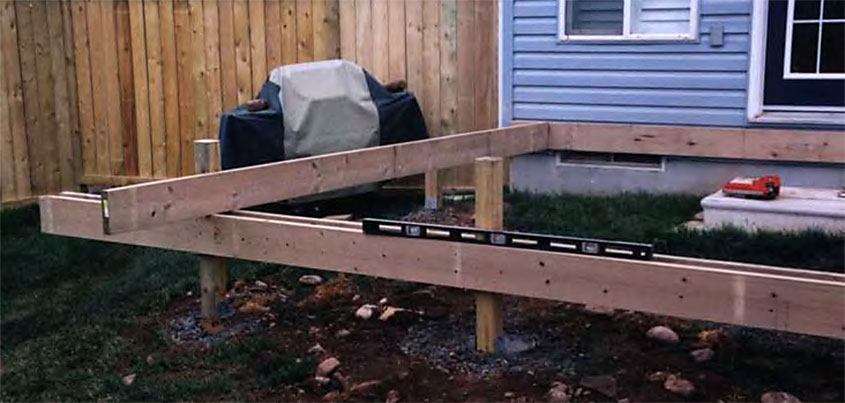
*For tall decks, 6x6 posts are substituted for the 4x4 posts and support beams are notched into the faces of the 6x6 posts.
Installing Beams for Cut Corners
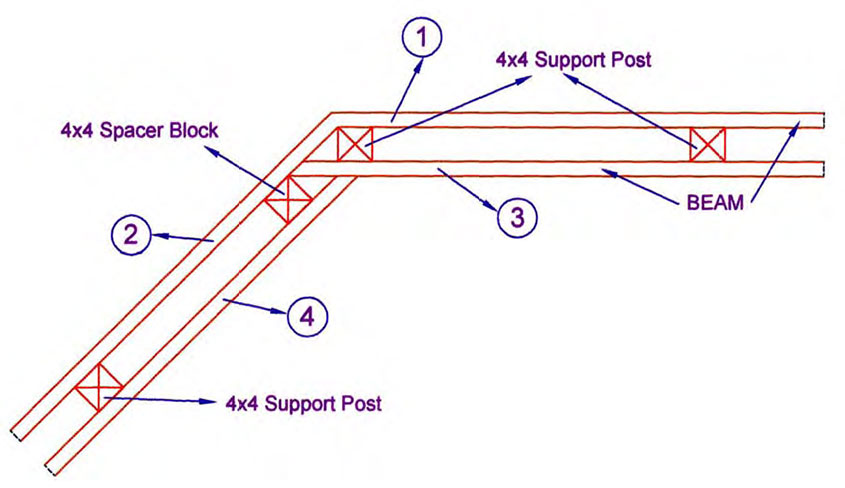
When installing wrap around beams position the overlap correctly by following the numbered pattern above.
- Run the inside front beam (3) into the backside of the front beam (2) this allows more fasteners to help secure beam (2).
- Install a 4x4 spacer block between the beams to help secure beam (4)
- Miter the end of beam (4) to fit snugly into the back face of beam (3).
Attaching the beams into each other distributes the weight so that each beam supports the others and creates a stronger joint.
Let in Beams
Where a beam meets a brick or stone wall and is cantilevered too far off of the nearest support post, code dictates the beam be “let in”. The brick or stone is cut out to allow the beam to extend past the face. The end of the beam is then supported by the brick or stone underneath its end.
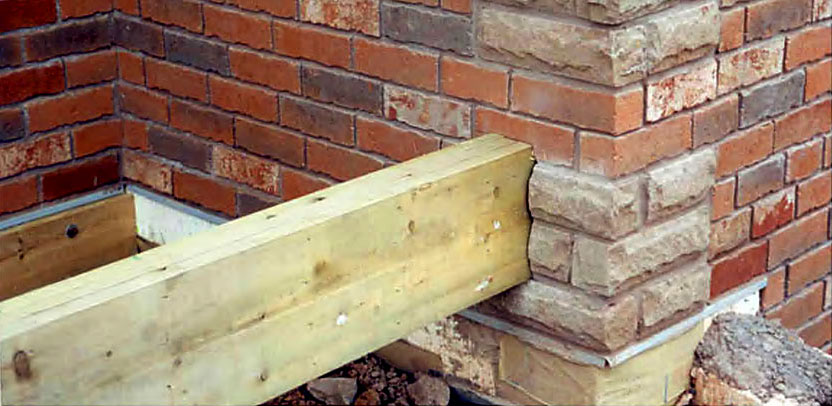
This beam is let in past the brick veneer with minimum 3” bearing over solid foundation. (However check your local building code) *In many locations, this will not be a factor. Check before cutting into expensive masonry.
Framing Using Beamless Substructure
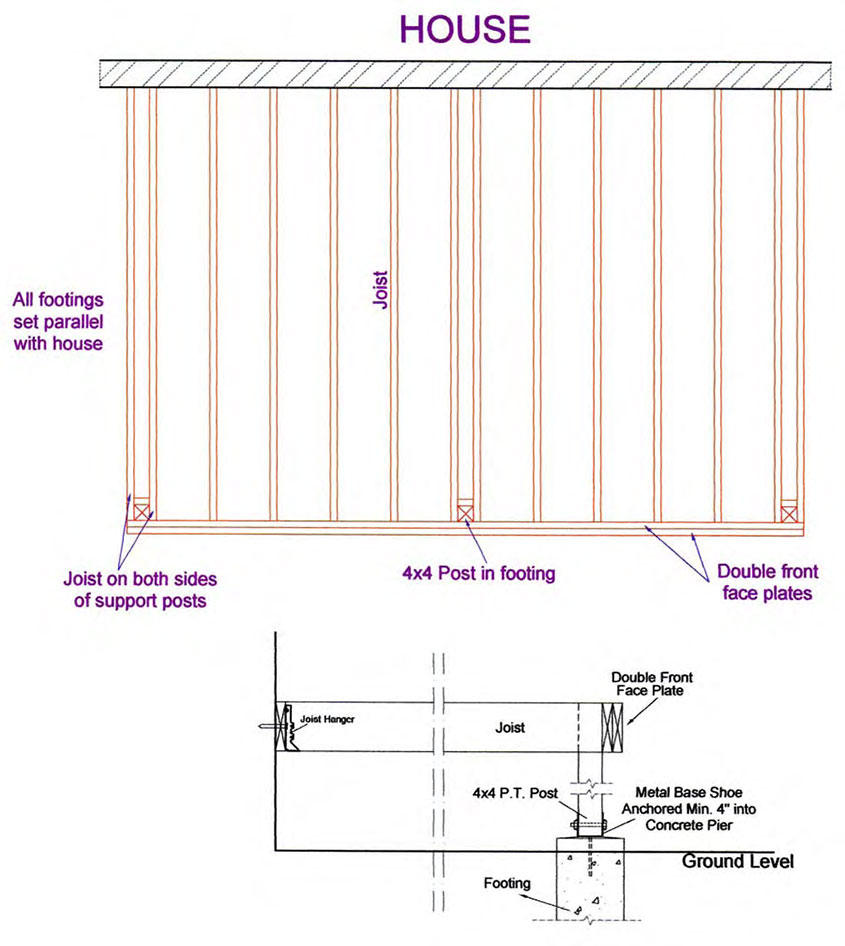
In cases where the deck is less than 17” above grade, the framing is constructed without using a beam. Simply attach a double 2x8 “face plate” against the outside face of your posts using 5” lag bolts, at the same height and level with the ledger against the house, so that the two pieces mirror each other.
