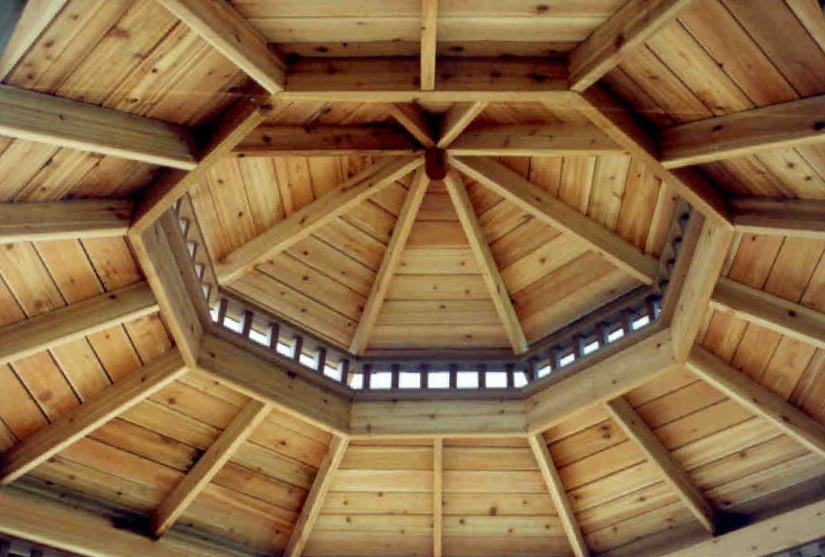
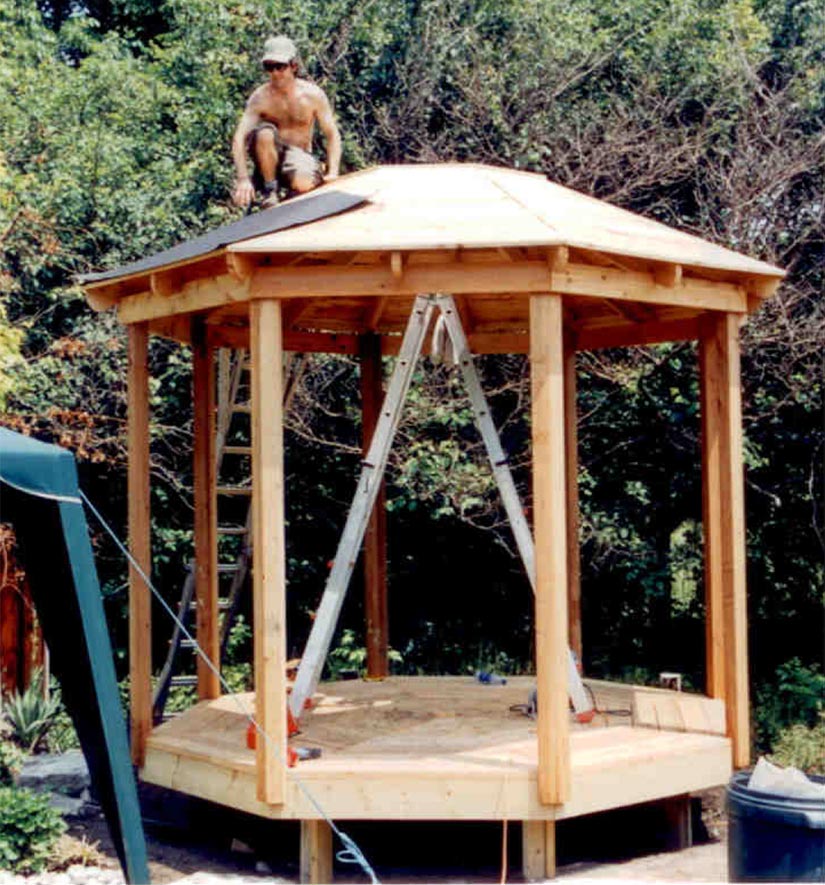
Gazebos: How to Install the Gazebo Roof Deck
Gazebos: How to Install the Gazebo Roof Deck DIY Deck PlansUse standard 5/4 cedar decking boards for your roof deck. This will provide a solid foundation for the remaining two layers. Install the boards so that the good face is turned toward the ground. The underside is visible and the top side is not only out of view, but will be covered by felt and wood shingles.
Installing the First Section
- Position deck boards on each “pie shaped” section, starting at the lower edge. Fit the first board parallel to the fascia, overlapping it evenly, according to plan dimensions.
- Fasten the board in place so that both ends overhang the edges of the triangular section. Use two fasteners into the top edge of each joist through the deck board.
- Add decking boards, moving toward the peak of the roof. Cut each board so that the ends overlap the edges of the triangular area between the main rafters and fasten them down.
- Mark the edges of the triangular section with a chalk line even with the center line between the triangular sections.
- Set a circular saw to a depth just barely deeper than the thickness of your deck boards. Cut along the chalk lines on both sides and remove the cut away pieces.
Completing the Gazebo Roof Deck
- Cut the ends of the boards for the next section to match the first, on a 22 ½ ° miter, long enough that the remaining end will overlap the opposite edge of the triangular section between main rafters.
- Fit the boards in place as before, starting from the bottom edge. Fasten each board in place as previously described.
- Mark and cut the long ends of the boards to fit the triangular area between the corner rafters.
- Continue decking in sections until you reach the last section. Measure and cut each piece to fit the last remaining section with miters on both ends.
Finishing the Gazebo Roof
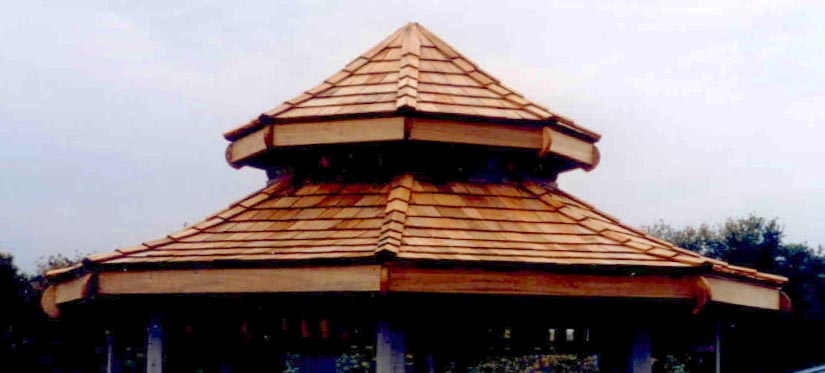
The gazebo roof goes on in three layers to provide a water tight surface. The middle layer is made up of roof felt. On top of that, shingles are installed to suit. Common choices are shingles that match your home or surrounding out buildings, or cedar shingles to match the trim of the gazebo.
Installing Roof Felt
- Roll roof felt across the first section so that it overlaps by at least six inches on both sides.
- Nail the felt in place with roofing nails fitted with plastic washers. Use one nail every six to twelve inches, smoothing the felt to keep it taut between nails.
- Cut the bottom edge of the felt along the edge of the fascia with a utility knife, or heavy scissors.
- Install the remaining sections in the same way, overlapping the felt along the edges where it meets the other pieces.
Installing Shingles
Shingle installation is a fairly simple procedure. It will vary slightly depending on whether you use cedar shingles or composite. The image below shows a fully shingled, curved roof.
- Start shingle installation along the bottom row at one corner. If you are using composite shingles a solid starter strip is used. Cut each shingle to fit using a utility knife, so that the edge is angled to fit with the rafter.
- Nail the shingle in place using manufacturers recommended fasteners and spacing. Shingles above should cover nails on the row below.
- Fit the shingles side by side until the bottom row is filled across an entire section.
- Start the next row above the first, using the manufacturer’s recommended spacing. Continue adding shingles until you reach the top.
- Use ridge shingles to cover the gap between sections along the corner rafters. Follow manufacturer’s recommended procedure for fitting and fastening.