Rail posts are typically made from 4x4 lumber. Depending on the material you use for your deck surface and trim, pressure treated posts, or cedar posts will work well. Post wraps, or covers are available to match most types of composite material as well and will generally fit 4x4 posts.
It is easiest to install posts before the decking. This can be done as the finishing step of your deck frame, or as the decking is being installed, pausing for post installation as you go.
Rail Post Layout
Mark the positions of your rail posts before installing decking. In general, one post every 4 to 8 feet is typical, check your local building codes and be sure to investigate your railing system to determine specific requirements.
There are two ways to layout deck posts:
- Start from one corner and position a rail post every so many feet to the opposite corner of the deck, or the end of the rail, if stairs or openings are present. The spacing will depend on code and railing requirements. All rail posts, except the last post will be evenly spaced.
- Measure the length of your rail section from corner to corner; divide the space evenly, so that posts are equally spaced. Choose spacing to meet minimum requirements of code and your rail choice.
Rail Post Installation
Rail posts are set on the inside face of the rim joist, or outside framing member. The post is then boxed in with blocking to create a sleeve for the post.
- Mark the position of the post.
- Install blocking between the two nearest joists, so that the blocking is 3½" off the inside face of the rim joist.
- Install blocking between the rim joist and the first blocking you installed, as needed to box the post in on all four sides.
- Set your post in place, with the bottom end flush with the bottom of the rim joist.
- Measure the height and cut the post to length.
- Install the post permanently using lag bolts through the blocking and rim joist into the post.
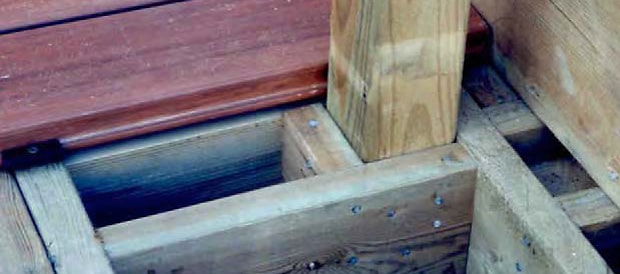
Intersecting with a Joist
If possible, lay out your rail posts to fit in the corner of the joist and rim joist. If spacing forces a post to be installed where a joist is mounted to the rim joist, cut the joist off 5 inches short of the rim joist. Install cross blocking between the joists on either side and reattach the cut joist to the blocking.
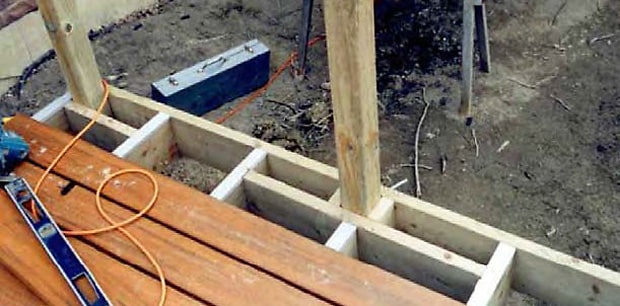
Forty-five Degree Corners
Anywhere that your deck comes to a forty-five degree corner, you have two choices of how to manage your post.
- Rip two posts on a 22½° angle along one edge and attach them together to create a 45° corner post.
- Install a standard post, so that one corner of the post is aligned with the inside corner of the angle.
Installing 22½° Corner Posts
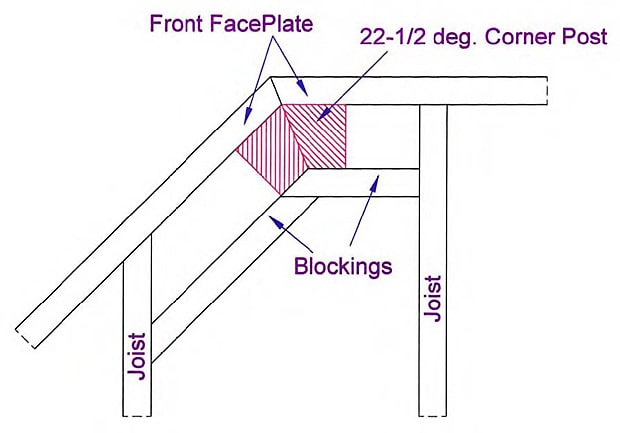
22½° posts are used when rails or privacy screens continue around an inside or outside 45 degree corner. Fasten 22½° post through both the front faceplate and with blocking to the joists.
Rail Sections Sharing a Corner Post
If a square post is being used on a cut corner of the deck cut the 2x4’s of the rail section around the rail post. Be sure to keep the same inset from the outside faceplate as the other rail sections.
Rail sections share a 4x4 corner post when 22½° posts do not permit. This often happens with maintenance free posts.
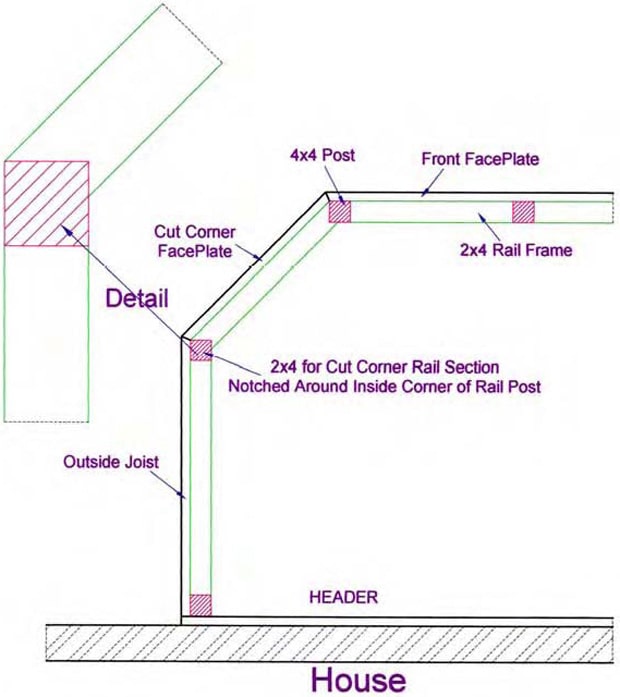
Railing Adjustment
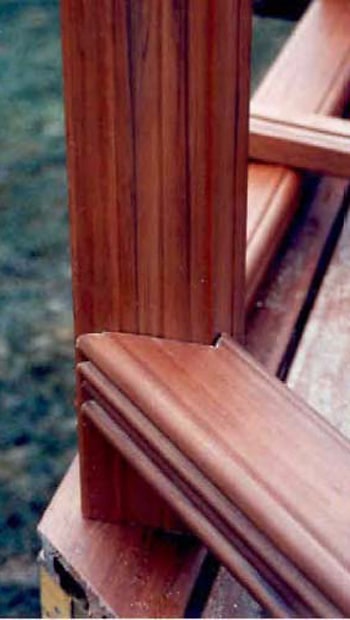
When using method two for 45° corners, notch your railing to fit around the post. The rail width will be wider than the angled face of the post on one side. Cut the notch, so that the extra width fits around the back corner of the post and the front edge of both railing and post are flush.
Decking Around Posts
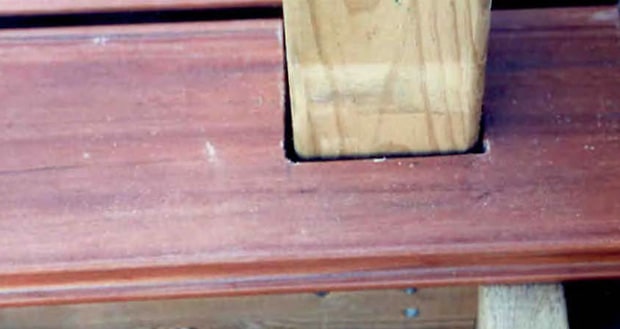
Cut to fit the decking as described in scribing around square shapes. Leave a slight gap for the expansion and contraction of your decking materials and wooden post, to prevent future issues.
Pro Tip
Rail posts can be installed a little longer than needed and left uncut. A chalk line and level are then strung along the row of posts to mark the top height of all posts in a single row.
Cut the posts to this height, so that the top of the posts are completely level, even if slight variations in the deck occur. The top line of your rail will be the most visible marker as to whether you deck is level. This ensures the best aesthetics.