Deck trim serves one main purpose, aesthetics. Deck trim material is typically chosen to match the deck boards used to cover the top of the deck. Common choices are cedar and maintenance free composite decking.
Most deck trim is installed horizontally. Use a material that matches your decking for a neat appearance. When installing horizontal trim, there are a few things to keep in mind.
- Always mount trim so that it is flush, or barely below the level of the deck top or stair treads for safety. This prevents tripping and makes your trim last longer as trim that protrudes will get kicked and eventually pop loose.
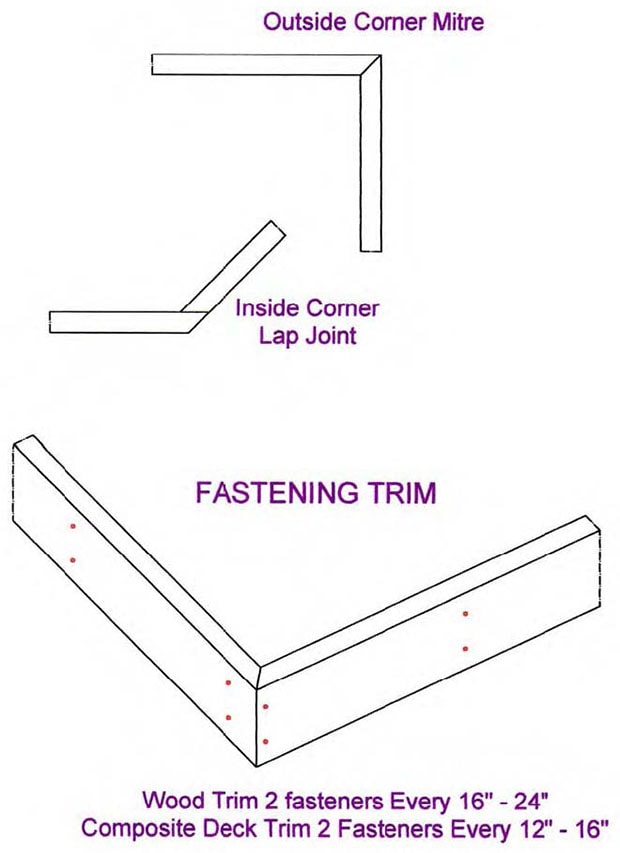
- Use at least two fasteners, one high, one low, every 12 to 16 inches along the entire length of every piece of trim. A pin, or finishing nail gun works well for this. Use fasteners that are at least as long as a double thickness of your trim material, for best results.
- Cut all miters to fit tight. If you are unsure of the angle, or fit, cut the mitered end first, fit it and adjust as needed, before cutting the other end to length. Use mitered corners when the corner is an outside corner.
- Cut and fit inside corners overlapping, as the photos indicate. This is an easier to get a clean, neat joint. It is also stronger.
- Keep your trim parallel to the deck top for best appearance. Use a chalk line to mark the top of any trim board that is not flush with the top of the deck or another piece.
- Use the bottom edge of your deck trim as an installation guide for skirting. Mount the skirting so that it runs up to and touches the bottom edge of your trim board.
- To prevent splitting in dry wood trim, use a small drill bit to pilot drill pieces before nailing them in place.
It is best to make repairs to trim as soon as they appear. This keeps your trim in good condition and prevents further damage to the deck. Keep trim stained and sealed if it is wood, to prevent rot.